
How to Soundproof Walls for Better Noise Reduction?
Noise rarely enters through one obvious gap. It travels through drywall, doors, floor structures, electrical outlets, and hidden framing connections. Effective sound proofing walls therefore requires more than attaching foam panels to a surface.
This guide explains how sound moves and why wall construction matters. Mass can block airborne noise, while decoupling reduces vibration between wall layers. Mineral wool may absorb sound inside a cavity, but it cannot replace proper sealing. Small openings around outlets or baseboards can weaken an otherwise strong assembly. Every room behaves differently.
Practical results depend on the noise source, wall design, and installation quality. A home office beside a busy street needs a different approach from a bedroom sharing a wall with a television room. Building professionals often consider factors such as Sound Transmission Class ratings, resilient channels, acoustic sealant, and double-layer drywall. These terms are useful, but ratings do not guarantee identical performance in every building.
A careful inspection should come before purchasing materials. Check for cracks, hollow cavities, loose outlets, and flanking paths through ceilings or floors. Some projects require local building advice, especially when modifying fire-rated assemblies or electrical components. Safety matters.
Perfect silence is uncommon. Results vary. Even careful plans can disappoint when workmanship is rushed. Seams must align, fasteners should avoid rigid bridges where appropriate, and all perimeter gaps need attention. The following methods focus on realistic noise reduction, measurable improvements, and mistakes that homeowners should avoid.
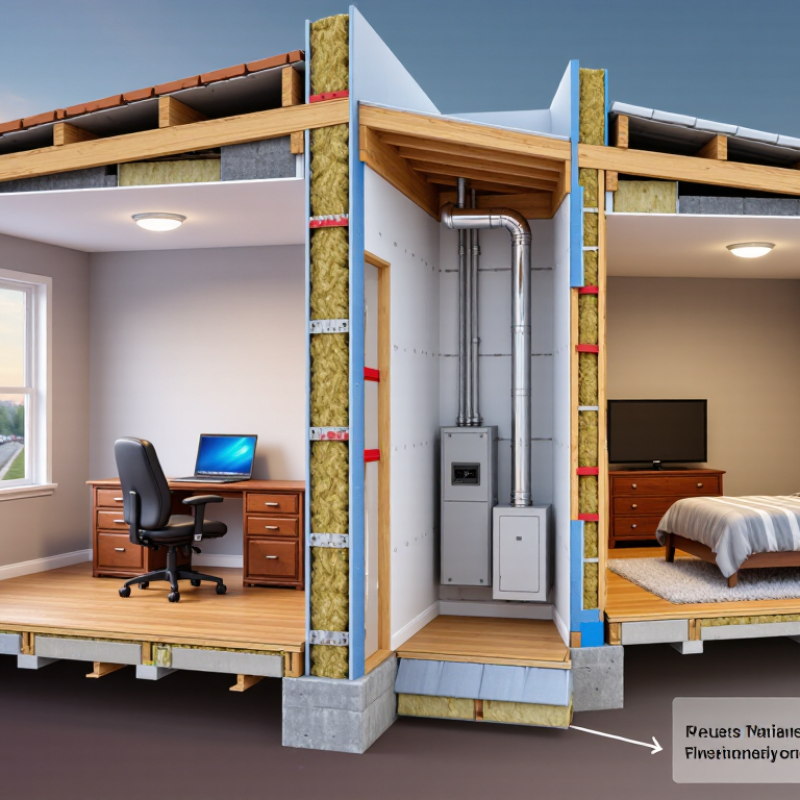
Set a noise-reduction target: IBC requires STC 50 or field-tested STC 45
How to Soundproof Walls for Better Noise Reduction?
Set a measurable target before choosing materials. Under commonly adopted IBC provisions, walls separating certain dwelling or sleeping units generally need an STC rating of 50 in laboratory testing, or 45 when tested in the field. Confirm the locally adopted code and the wall’s specific use; requirements can vary. STC 50 is not a promise of silence. It describes how well an assembly reduces speech-range sound, not every bass note, footstep, or vibration.
The rating applies to the complete wall assembly, not just its insulation. A tested design may combine two layers of drywall, insulated framing, and carefully sealed edges. A narrow gap around an outlet or at the floor can weaken performance. So can rigid connections that carry vibration between wall layers. Use a tested assembly where possible, and seal joints around the perimeter with an appropriate acoustic sealant. Small details matter.
Field results can disappoint. A wall may meet its laboratory rating on paper but perform worse after installation, especially if pipes, ducts, or back-to-back electrical boxes create sound paths. STC also cannot tell you exactly how private a room will feel. Listen for low-frequency hums and impact noise, then address those paths separately. The target is useful, but it is not the whole answer.
| Planning Dimension | Requirement or Verified Guidance | Design and Site Check |
|---|---|---|
| IBC airborne sound-isolation target | For covered separations between dwelling units, and between dwelling or sleeping units and public or service areas, the IBC generally specifies STC 50 when tested in a laboratory, or STC 45 when tested in the field. | Confirm the adopted code edition, local amendments, occupancy, and wall location with the building official or design professional. |
| What the STC number represents | STC is a single-number rating of airborne sound isolation across a range of frequencies. It is not a guarantee that every sound will be inaudible. | STC does not fully describe low-frequency noise, impact noise, or sound traveling around a wall through adjoining construction. |
| Choose a tested wall assembly | Sound isolation depends on the complete assembly, including framing, board layers, cavity treatment, connections, and installation. A material’s rating alone does not establish the wall’s STC. | Specify an assembly with a laboratory test report that meets the project target; match the tested framing, layers, and installation details. |
| Increase wall mass | Adding gypsum-board layers can increase the mass of a wall, but the resulting STC depends on the full tested assembly and how it is installed. | Follow the assembly specification for board type, layer count, fastener layout, and joint treatment. Avoid assuming a fixed STC increase per layer. |
| Reduce rigid connections | Resilient channels or isolated framing can reduce some vibration transfer when used as part of a properly designed and tested system. | Prevent screws, fixtures, or other fasteners from unintentionally bridging the isolation layer to the framing behind it. |
| Treat the wall cavity | Fibrous cavity insulation can help absorb sound within a stud cavity, but it does not replace mass, decoupling, or airtight construction. | Install the specified insulation evenly without gaps or excessive compression, while keeping it clear of systems where required. |
| Seal air gaps | Gaps at wall edges, joints, and penetrations can let sound pass through. Airtight perimeter and penetration sealing is an important part of the wall system. | Seal suitable joints with compatible acoustic sealant; use approved firestopping where a rated assembly or penetration requires it. |
| Plan outlets and penetrations | Back-to-back electrical boxes and unsealed service openings can weaken sound isolation and may also affect fire and electrical compliance. | Coordinate box locations and approved protective details with the tested wall design. Do not cut or alter a rated assembly without an approved detail. |
| Check flanking paths | Sound can bypass a wall through ceilings, floors, ducts, doors, windows, and connected framing; improving the wall alone may not resolve the problem. | Inspect adjoining construction and openings, and coordinate acoustic details across the full separation rather than treating only the visible wall face. |
| Verify completed work | Field measurements use different conditions from laboratory testing; the IBC’s field alternative is STC 45 where the applicable provision allows it. | Arrange testing by a qualified acoustical professional when required or when performance must be confirmed, and address installation defects before retesting. |
Related Posts
-
How to Choose Acoustic Sound Panels for Walls Effectively?
-
How to Choose Acoustic Treatment for Your Space?
-
What Are Sound Insulation Panels and How Do They Work?
-
Why Choose Sound Proof Panels for Walls?
-

Top Acoustic Treatment Panels for Soundproofing Your Space?
-
What Are the Best Acoustic Sound Panels in 2026?